サーバレスのバックエンド作成サービス「AWS Amplify」で認証認可機能付きのダッシュボードを作る:AWSチートシート
AWS活用における便利な小技を簡潔に紹介する連載「AWSチートシート」。今回は、「AWS Amplify」で認証認可機能付きのダッシュボードを作成する方法を紹介する。
「Amazon Web Services」(AWS)活用における便利な小技を簡潔に紹介する連載「AWSチートシート」。今回は「AWS Amplify」を使って認証認可機能付きのダッシュボードを作成します。
「AWS Amplify」とは
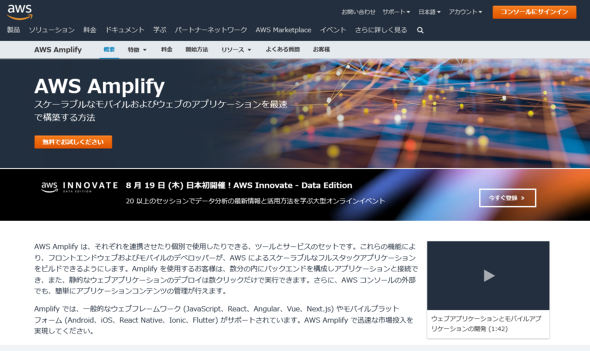
Amplifyの公式サイトでは下記のように説明されています。
AWS Amplifyは、それぞれを連携させたり個別で使用したりできる、ツールとサービスのセットです。これらの機能により、フロントエンドウェブおよびモバイルのデベロッパーが、AWSによるスケーラブルなフルスタックアプリケーションをビルドできるようにします。Amplifyを使用するお客様は、数分の内にバックエンドを構成しアプリケーションと接続でき、また、静的なウェブアプリケーションのデプロイは数クリックだけで実行できます。さらに、AWSコンソールの外部でも、簡単にアプリケーションコンテンツの管理が行えます。
要約すると、Amplifyは「AWS Lambda」「Amazon DynamoDB」「Amazon Cognito」などのAWSのサービスを使いやすくパッケージ化したものです。「amplify add api」といったコマンドをやりたいことベースで入力し、簡単な質問に数問答えれば後は自動でバックエンドが構築されます。
できるだけ早くアイデアをプロダクトにしていく必要のある場合や、フロントエンド寄りのエンジニアが主体の開発チームにおいても、迅速にサーバレスシステムのバックエンドを構築するのに役立つでしょう。
Vue.js、Nuxtを使って認証認可機能付きのダッシュボードを作成
ここからは、Amplifyの使い方を具体的に紹介するために、「Vue.js」のフレームワーク「Nuxt」を使って20分ほどで認証認可が整ったダッシュボード画面を作ります。手順は以下の通りです。
- Amplifyのインストール&初期設定
- 任意のディレクトリでNuxtプロジェクトを作成
- Amplifyのバックエンドを作成
- Amplifyの機能を追加
- 追加した機能をクラウド上に構築
- フロントにAmplifyを読み込ませる
- 認証認可を入れる
1.Amplifyのインストール&初期設定
最初はAmplifyのインストールです。
npm install -g @aws-amplify/cli
インストールが終わったら、初期設定をします。下記のように「amplify configure」コメンドによって、Amplifyを使うAWS環境の設定ができます。
amplify configure
Scanning for plugins...
Plugin scan successful
Follow these steps to set up access to your AWS account:

Sign in to your AWS administrator account:
https://console.aws.amazon.com/
Press Enter to continue
AWSにログインしていなければログインします。ログインしていればコンソールが直接開くはずなので、特に何もせずターミナルに戻り「Enter」キーを押します。
Specify the AWS Region ? region: ap-northeast-1 //東京リージョンを選択 Specify the username of the new IAM user: ? user name: ○○○○ //好きな名前を入れる Complete the user creation using the AWS console https://console.aws.amazon.com/iam/home?region=〜〜〜〜〜 //上記で入れた情報でブラウザが開かれる Press Enter to continue
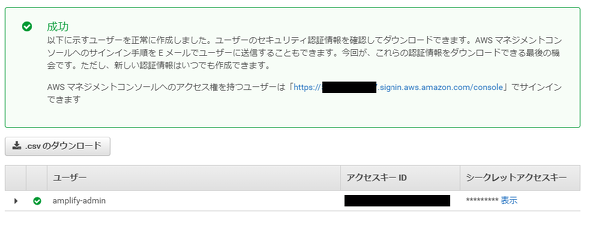
開かれたブラウザでは、基本的に「次へ」を押すだけで大丈夫です。ユーザーを作ったら下記のような画面になるはずなのでターミナルに戻ります。
画面で出てきた情報を下記のようにコピー&ペーストします(※この情報は絶対に流出させないよう細心の注意を払ってください)。「Profile Name」は何でも構いません。今回はdefaultにしました。
Enter the access key of the newly created user:
? accessKeyId:  // 上記画面に表示されているアクセスキーID
? secretAccessKey:  // 上記画面に表示されているシークレットアクセスキー
This would update/create the AWS Profile in your local machine
? Profile Name:  default //任意の名前を付ける

Successfully set up the new user.
2.任意のディレクトリでNuxtプロジェクトを作成
下記のコマンドでNuxtプロジェクトを作ることができます。{project-name}には作りたいアプリ名を入れます。
npm init nuxt-app {project-name}
今回は下記のように設定しました。
npm init nuxt-app techno_co-project
5秒ほど待ったら幾つか質問されるので下記のように答えます。
create-nuxt-app v3.6.0
Generating Nuxt.js project in techno_co-project
? Project name: techno_co-project
? Programming language: JavaScript
? Package manager: Npm
? UI framework: Vuetify.js
? Nuxt.js modules: Axios - Promise based HTTP client, Progressive Web App (PWA)
? Linting tools: ESLint, Prettier
? Testing framework: None
? Rendering mode: Single Page App
? Deployment target: Static (Static/Jamstack hosting)
? Development tools: jsconfig.json (Recommended for VS Code if you're not using typescript)
? Continuous integration: None
? Version control system: Git
それぞれの意味については下記参考ページを見てください。
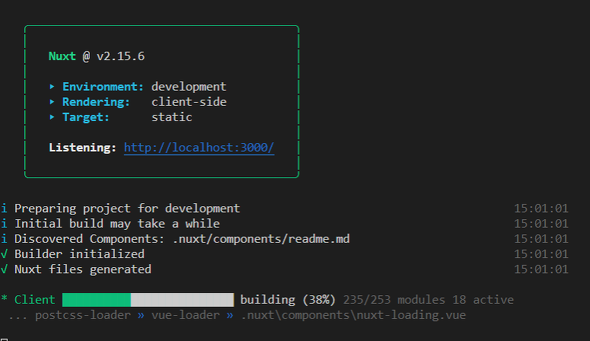
下記のコマンドで、一度localhostを立ててみましょう。
cd techno_co-project  //作ったプロジェクトの階層に移るのをお忘れなく
npm run dev
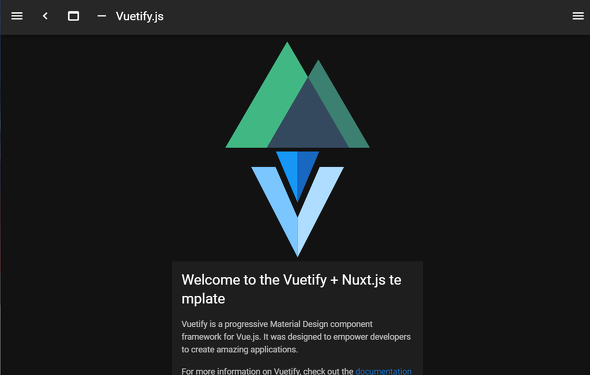
「http://localhost:3000/」にアクセスして下記のような画面が出てきたらOKです。
以降の作業のために「generate」コマンドを使ってファイルを生成しておきます。
npm run generate
「dist」ディレクトリが作られて中身が入っていればOKです。
3.Amplifyのバックエンドを作成
プロジェクトディレクトリの上で「amplify init」コマンドを実行すると、Amplifyをプロジェクトにインストールできます。
$ amplify init
Note: It is recommended to run this command from the root of your app directory
? Enter a name for the project  ○○○○ //好きなプロジェクト名を入れる
? Enter a name for the environment dev //「dev」のままでOK
? Choose your default editor: Visual Studio Code //お好きなエディタを選択
? Choose the type of app that you're building javascript //どの言語で書くか決める
Please tell us about your project
? What javascript framework are you using vue //今回はNuxtを使うのでVue.jsを選択
? Source Directory Path:  src
? Distribution Directory Path: dist
? Build Command:  npm.cmd run-script generate
? Start Command: npm.cmd run-script start
? Select the authentication method you want to use: AWS profile
? Please choose the profile you want to use ○○ //先ほど作ったIAMを選択
Vue.jsにはAmplifyと通信するなどが可能なライブラリが準備されているので、このタイミングで追加します。
npm install aws-amplify @aws-amplify/ui-vue
4.Amplifyの機能を追加
Amplifyは、「add」コマンドを実行して質問に答えるだけで、入れたい機能のバックエンドを構築できる便利なサービスです。
今回記事の長さの都合で動作確認するのは認証認可機能のみですが、APIも一緒に作りたいことが多いと思うので、NoSQLデータベース、API、認証認可機能をプロジェクトには追加します。
※注意 作る順番に注意しましょう
今回はREST APIをたたいたときにその先のLambdaからDynamoDBのデータを取ってくるようにしたいので、ストレージ→API(この項目の中で認証認可も一緒に設定)の順番で作ります(API作成中でもストレージは作れますが、混乱するので私は先に作っておく方が分かりやすいと感じました)。
まずはDynamoDBから作ります。
$ amplify add storage
? Please select from one of the below mentioned services: NoSQL Database

Welcome to the NoSQL DynamoDB database wizard
This wizard asks you a series of questions to help determine how to set up your NoSQL database table.

? Please provide a friendly name for your resource that will be used to label this category in the project: techdynamotest
? Please provide table name: techdynamotest

//カラムの情報を設定する。カラム名入力後にタイプを選択し、まだ設定するカラムがあるなら「y」を、ないなら「n」を押して終了する
You can now add columns to the table.

? What would you like to name this column: id
? Please choose the data type: number
? Would you like to add another column? Yes
? What would you like to name this column: name
? Please choose the data type: string
? Would you like to add another column? Yes
? What would you like to name this column: overview
? Please choose the data type: string
? Would you like to add another column? No

Before you create the database, you must specify how items in your table are uniquely organized. You do this by specifying a primary key. The primary key uniquely identifies each item in the table so that no two items can have the same key. This can be an individual column, or a combination that includes a primary key and a sort key.

To learn more about primary keys, see:
https://docs.aws.amazon.com/amazondynamodb/latest/developerguide/HowItWorks.CoreComponents.html#HowItWorks.CoreComponents.PrimaryKey

//パーティションキーを設定する。今回は「id」に、ソートキーは「name」に
? Please choose partition key for the table: id
? Do you want to add a sort key to your table? Yes
? Please choose sort key for the table: name

You can optionally add global secondary indexes for this table. These are useful when you run queries defined in a different column than the primary key.
To learn more about indexes, see:
https://docs.aws.amazon.com/amazondynamodb/latest/developerguide/HowItWorks.CoreComponents.html#HowItWorks.CoreComponents.SecondaryIndexes

//グローバルセカンダリーインデックスとLambdaへのトリガーは今回必要ないので「No」で流す
? Do you want to add global secondary indexes to your table? No
? Do you want to add a Lambda Trigger for your Table? No
Successfully added resource techdynamotest locally

If a user is part of a user pool group, run "amplify update storage" to enable IAM group policies for CRUD operations
Some next steps:
"amplify push" builds all of your local backend resources and provisions them in the cloud
"amplify publish" builds all of your local backend and front-end resources (if you added hosting category) and provisions them in the cloud
次にAPIを追加します。
$ amplify add api

? Please select from one of the below mentioned services: REST
? Provide a friendly name for your resource to be used as a label for this category in the project: techtestapi
? Provide a path (e.g., /book/{isbn}): /test
? Choose a Lambda source Create a new Lambda function
? Provide an AWS Lambda function name: techtestfunc
? Choose the runtime that you want to use: NodeJS
? Choose the function template that you want to use: CRUD function for DynamoDB (Integration with API Gateway)
? Choose a DynamoDB data source option Use DynamoDB table configured in the current Amplify project
// ここで先ほど作成しておいたDBが表示される
? Choose from one of the already configured DynamoDB tables techdynamotest

Available advanced settings:
- Resource access permissions
- Scheduled recurring invocation
- Lambda layers configuration

? Do you want to configure advanced settings? Yes
? Do you want to access other resources in this project from your Lambda function? No
? Do you want to invoke this function on a recurring schedule? No
? Do you want to configure Lambda layers for this function? No
? Do you want to edit the local lambda function now? Yes
Edit the file in your editor: C:\Users\Takuya_Ishida\Desktop\Techno,co\technoco-project\amplify\backend\function\techtestfunc\src\app.js
? Press enter to continue
Successfully added resource techtestfunc locally.

Next steps:
Check out sample function code generated in <project-dir>/amplify/backend/function/techtestfunc/src
"amplify function build" builds all of your functions currently in the project
"amplify mock function <functionName>" runs your function locally
"amplify push" builds all of your local backend resources and provisions them in the cloud
"amplify publish" builds all of your local backend and front-end resources (if you added hosting category) and provisions them in the cloud
Succesfully added the Lambda function locally
//ここでAPIを制限する設定を「Yes」にすると自動的にCognitoを作成し、認証認可の仕組みを作ってくれる
? Restrict API access Yes
? Who should have access? Authenticated users only
? What kind of access do you want for Authenticated users? create, read, update, delete
Successfully added auth resource locally.
//ここで「Yes」を選ぶと、また別のPathのAPIを作れる
? Do you want to add another path? No
Successfully added resource techtestapi locally
以上で準備完了です。
5.追加した機能をクラウド上に構築
下記コマンドを実行します。
$ amplify push

√ Successfully pulled backend environment dev from the cloud.

Current Environment: dev

| Category | Resource name   | Operation | Provider plugin   |
| -------- | --------------- | --------- | ----------------- |
| Storage  | techdynamotest  | Create    | awscloudformation |
| Function | techtestfunc    | Create    | awscloudformation |
| Auth     | cognito0f503c00 | Create    | awscloudformation |
| Api      | techtestapi     | Create    | awscloudformation |
? Are you sure you want to continue? Yes
| Updating resources in the cloud. This may take a few minutes.
5〜10分ほど待つと、クラウドへのデプロイが終わります。
6.フロントにAmplifyを読み込ませる
バックエンドの準備ができたので、フロントに組み込みます。「plugins」ディレクトリの下に「amplify.js」という名前でファイルを作成し、下記コードを記載します。
import Vue from 'vue'
import Amplify from 'aws-amplify'
import '@aws-amplify/ui-vue'
import awsExports from '../src/aws-exports'
Amplify.configure(awsExports)
Vue.use(Amplify)
このコードでは、「src」ディレクトリの下にある「aws-exports.js」というバックエンド情報が書き出されたファイルを参照し、それをプラグインとして読み込むようにしています。ちなみに、「aws-exports」は「gitignore」と指定されているので、誤ってGitに上がったりすることはないので安心ください。
続いて、amplify.jsをNuxtに設定します。「nuxt.config.js」に移動して、下記を追記します。
// pluginsの配列に追加する
plugins: [{ src: '~/plugins/amplify.js', ssr: false }],
これでAmplifyがNuxtに組み込まれました。
7.認証認可機能を入れる
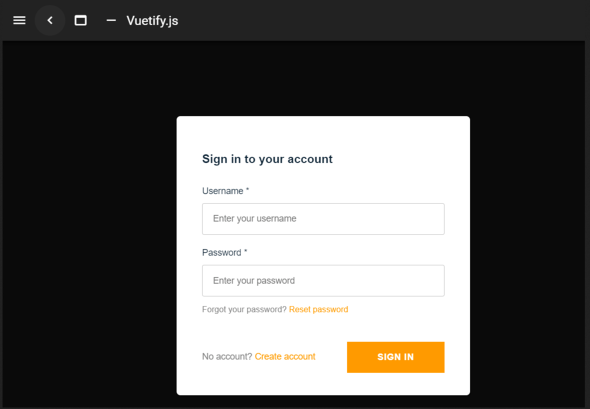
今回はCognitoを使った認証認可機能を取り入れてみましょう。使い方はシンプルで、認証しないと見られないようにしたい箇所を下記のタグで囲うだけです。認証されていない場合は、このタグを読むと自動でログイン画面に遷移します。
<amplify-authenticator></amplify-authenticator>
今回は、Nuxtを立ち上げたときに入っていた「~pages/inspire.vue」のページを認証対象ページにして確認します。
<template>
  <amplify-authenticator>
    <v-row>
      <v-col class="text-center">
        <img src="/v.png" alt="Vuetify.js" class="mb-5" />
        <blockquote class="blockquote">
          “First, solve the problem. Then, write the code.”
          <footer>
            <small>
              <em>—John Johnson</em>
            </small>
          </footer>
        </blockquote>
      </v-col>
    </v-row>
  </amplify-authenticator>
</template>
そして保存して自動コンパイルが走り終わってから確認してみると、
このように「inspire」のページだけ認証が走っています。「index.vue」には上記amplify-authenticatorタグを入れていないのでログインなしでも閲覧できます。
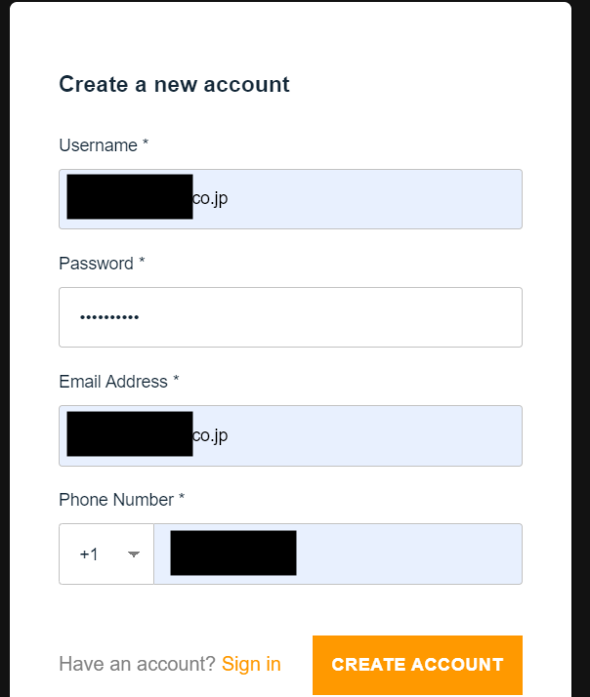
現在はCognitoが作られたばかりでアカウントが存在していないので、左下の「Create account」ボタンを押してアカウントを作ります。「Username」はメールアドレスを入れるように指定されました。
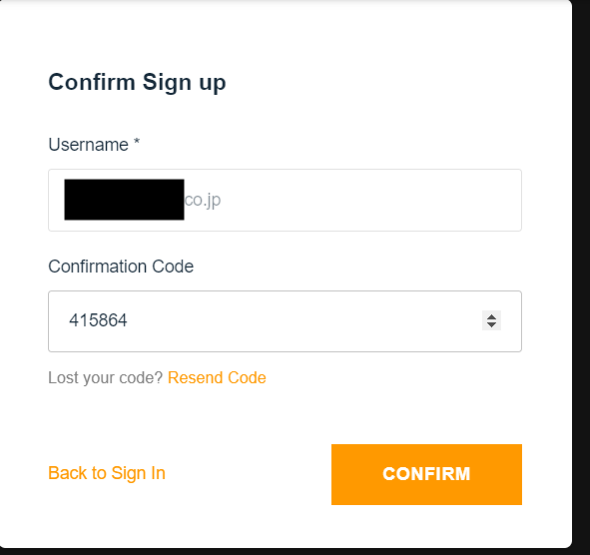
「Create account」ボタンを押すとメールが届くので、記載の認証番号を打ち込みます。
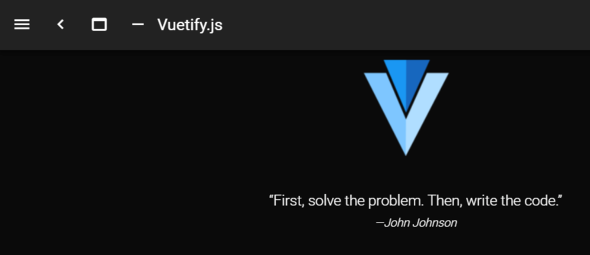
inspire.vueを見ることができました。
まとめ
ログイン機能は今やほぼ全てのWebシステムで必須機能ですが、一から実装すると時間がかかります。Amplifyでは、今回紹介したように少ない時間で実装できます。また、使っているサービスがサーバレスなので、ランニングコストも安く抑えることができます。
今回は紹介しませんでしたが、これ以外にもREST API/GraphQL活用、「Amazon S3」ストレージへのホスティング、「AWS Code Commit」「GitHub」と連携させたCI/CD(継続的インテグレーション/継続的デリバリー)パイプライン構築なども可能です。
サーバレスには興味があったが今まで触ったことがなかった方、LambdaやDynamoDB、「Amazon API Gateway」をバラバラに構築していた方は、ぜひこの機会にAmplifyを使ってみてはいかがでしょうか。
筆者紹介
石田 卓也(いしだ たくや)
株式会社システムシェアード xTechLab事業部所属。
普段はWeb技術、直近はAI、機械学習、IoT、サーバレスアプリケーションなど先端技術を用いて主体的に開発する。技術を探究するのはもちろん、産業×ITがどのように社会に利益を生み出せるかという観点の下、素晴らしい技術がもっと世間に広まるよう活動している。保有AWS認定資格は、「AWS認定ソリューションアーキテクト」「Alexa Skill Builder」など。
Copyright © ITmedia, Inc. All Rights Reserved.
関連記事
 ユーザー解析機能が無料になったFirebaseの使い方超入門
Firebaseのデータベース機能を使って無料のチャットアプリを作ることで、FirebaseやFirebase Analyticsの使い方について解説します。 東京都、Vue+Nuxt.jsで構築した「新型コロナウイルス感染症対策サイト」をNetlifyで公開
東京都は、「新型コロナウイルス感染症対策サイト」を公開した。VueやNuxt.jsなどのJavaScriptフレームワークやホスティングサービスのNetlifyを活用している。 サーバレスアーキテクチャを詳しく知る
本連載では、サーバレスコンピューティングの概要とユースケース、コンテナオーケストレーションやPaaSとの使い分け方などを解説した、Cloud Native Computing Foundationのホワイトペーパーを完訳してお届けしている。第4回は、サーバレスアーキテクチャとはどのようなものかを、技術的に解説した部分を掲載する。
