iPhoneアプリで位置情報と地図を使うための基礎知識:iOSでジオ(GEO)プログミラング入門(1)(3/3 ページ)
アノテーションを追加するには
次は、アノテーションを追加してみます。
表示すべきデータのモデル(Model)と、それを実際に表示するときの見た目(View)は分離されます。モデルを表すのが「MKAnnotation」プロトコル、見た目を実装するのが「MKAnnotationView」クラスです。
簡単なアノテーションの作成のために、「CustomAnnotation」クラスを追加します。座標とタイトル・サブタイトルを持ったシンプルなクラスで、「MKAnnotation」に定義されているプロパティを備えます。
#import "CustomAnnotation.h"

@implementation CustomAnnotation
@synthesize coordinate;
@synthesize annotationTitle;
@synthesize annotationSubtitle;

- (NSString *)title {
    return annotationTitle;
}

- (NSString *)subtitle {
    return annotationSubtitle;
}

- (id)initWithLocationCoordinate:(CLLocationCoordinate2D) _coordinate
    title:(NSString *)_annotationTitle subtitle:(NSString *)_annotationSubtitle {
    coordinate = _coordinate;
    self.annotationTitle = _annotationTitle;
    self.annotationSubtitle = _annotationSubtitle;
    return self;
}

- (void) dealloc {
    [annotationTitle release];
    [annotationSubtitle release];
    [super dealloc];
}

@end「MKMapView#adAnnotation」メソッドを使ってアノテーションを追加します。
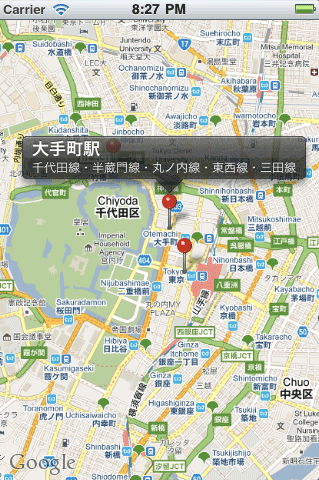
動かしてみたところ、ピンをタップすると、タイトルとサブタイトルが表示されるます。
デフォルトの赤いピンをカスタマイズするには
アノテーションをカスタマイズすることもできます。オリジナルのアノテーションを作るためには、「MKAnnotationView」クラスを拡張します。
今回は、デフォルトの赤いピンの代わりに、リソースファイルとして追加した画像「flag.png」を表示するという簡単なカスタマイズを行います。
#import <Foundation/Foundation.h>
#import <MapKit/MapKit.h>

@interface CustomAnnotationView : MKAnnotationView {
}

@end「MKMapView」にデリゲート(「MKMapViewDelegate」プロトコルを実装)をセットすると、アノテーションを表示する必要が生じたタイミングで、そのデリゲートの「viewForAnnotation」メソッドが呼ばれます。そこで、「MKAnnotationView」を返せば、地図上に表示されます。「nil」を返せば、デフォルトのビュー(赤いピンと黒い半透明の吹き出し)が表示されます。
MKAnnotationView(および、そのサブクラス)は、種類ごとに再利用し、「使い回し」する仕組みがあります。「MKMapView#dequeueReusableAnnotationViewWithIdentifier」メソッドを使うと、「その種類のアノテーションビューで、使い回しできるもの」が返されます。
再利用可能なアノテーションビューがあれば、そのビューを取得し、必要ならばアノテーションの内容に合わせてデータの流し込みなどを行います。再利用可能なアノテーションビューがなければ「nil」が返されるので、そのときだけ、新しいMKAnnotationViewインスタンスを生成する、という使い方をします。
「UITableView」「UITableViewCell」を使ったことのある方なら、「セルの再利用」で似たような実装をしたことがあるでしょう。
「GeoPhotoViewController.h」宣言部分に下記の太字部分を追加します。
GeoPhotoViewController#viewDidLoadに追加します。
[mapView setDelegate: self];GeoPhotoViewController.mに「viewForAnnotation」メソッドを追加します。
実は、「ユーザーの現在地」も、アノテーションの一種として扱われます。そして、「ユーザーの現在地」を表すアノテーションに対しては、デフォルトでは青いドットが表示されます。
ちなみに、ユーザーの現在地を表示する/しないの切り替えは、MKMapViewの「showsUserLocation」プロパティで行います。
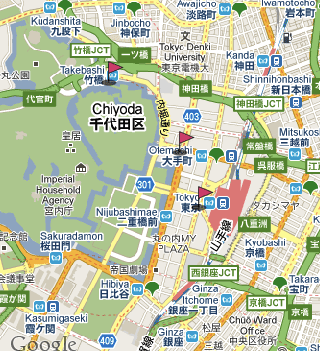
【2】の部分をご覧ください。渡された「MKAnnotation」が「ユーザーの現在地」であれば「nil」を返すという処理を行っています。こうすると、現在地には、青いドットを、それ以外の場所にはカスタマイズした旗のアイコンを表示します。
今後は、Flickr APIとマッシュアップ
本稿では、「現在地の近辺で撮影された写真を地図上に表示するアプリ」を作るために、基礎としてCoreLocationとMapKitの2つのフレームワークの使い方を中心に解説しました。
最後の章では、アプリのリソースとして画像を用意しましたが、ここに、ネットワーク経由で取得した画像などを使うことももちろんできます。今後以下の予定で連載をする予定ですが、第3回ではFlickr APIを使って取得した写真のサムネイルを地図にする方法を解説しますので、お楽しみに。
- 第1回:測位機能と地図の基礎を学ぶ(終了)
- 第2回:XMLパーサの作り方を学ぶ。マッシュアップの準備として、Flickr APIのパーサを書く
- 第3回:Flickr APIを使って取得した情報を使って、地図上に近所の写真のサムネイルを表示。さらに、アプリケーションのブラッシュアップを行う
著者紹介
株式会社鳥人間
郷田まり子(ごうだまりこ)
1980年東京生まれ、プログラマ。建築製図から人工衛星観測まで、ユーザーに驚きをもたらす数々のWebサービスを実装してきたs。現在、創業二年社員二名の株式会社鳥人間にて、主にWeb開発案件を手掛ける。本業の傍ら、目新しくて面白そうな物にはとりあえず飛びついてハックしている
関連記事
- クラウドで動くGPS連動スマホ用Webアプリを作る
たぶん1時間でできるマッシュアップ講座 - 携帯の醍醐味! 位置情報とGoogleマップを使うには
クラウドとフレームワークで超簡単ケータイ開発(終) - 地図/位置情報/GPSを使うAndroidアプリを作るには
Androidで動く携帯Javaアプリ作成入門(16) - 歌あり笑いあり過去最大規模となった技術者の祭典
D89クリップ(20)MA6表彰式レポート - Windows 7でセンサや位置情報を使うアプリを作ろう
楽しいWindows 7アプリ作成入門(2) - 位置情報を取得する仕組み
連載:位置情報を使ってみよう(1)
Copyright © ITmedia, Inc. All Rights Reserved.
アイティメディアからのお知らせ


注目のテーマ

編集部からのお知らせ
![]() ITmediaはアイティメディア株式会社の登録商標です。
ITmediaはアイティメディア株式会社の登録商標です。