Windows PhoneのMetro UIをタッチでジェスチャ操作:Silverlightベースで作るWP7アプリ開発入門(4)(3/3 ページ)
Flickを利用するには
Flickを利用するには、WPToolkitを参照に追加します。
WPToolkitを追加したら、ネームスペースにtoolkitの利用を宣言します。
<phone:PhoneApplicationPage
  xmlns="http://schemas.microsoft.com/winfx/2006/xaml/presentation"
  xmlns:x="http://schemas.microsoft.com/winfx/2006/xaml"
  xmlns:phone="clr-namespace:Microsoft.Phone.Controls;assembly=Microsoft.Phone"
  xmlns:shell="clr-namespace:Microsoft.Phone.Shell;assembly=Microsoft.Phone"
  xmlns:d="http://schemas.microsoft.com/expression/blend/2008"
  xmlns:mc="http://schemas.openxmlformats.org/markup-compatibility/2006"
  xmlns:toolkit="clr-namespace:Microsoft.Phone.Controls;assembly=Microsoft.Phone.Controls.Toolkit"
WPToolkitを利用すると、GestureServiceでジェスチャを利用できます。ボタンをGestureServiceを使うように書き換えます。
<Button Content="Button" Margin="76,39,72,297">
  <toolkit:GestureService.GestureListener>
    <toolkit:GestureListener
        Tap="Button_Tap"
        DoubleTap="Button_DoubleTap"
        Hold="Button_Hold"
        Flick="Button_Flick"
        DragDelta="Button_DragDelta"
        PinchStarted="Button_PinchStarted"
        PinchDelta="Button_PinchDelta"
    />
  </toolkit:GestureService.GestureListener>
</Button>
次に処理を書きましょう。デフォルトのジェスチャではSystem.Windows.Input.GestureEventArgsを使っていましたが、WPToolkitではMicrosoft.Phone.Controls.GestureEventArgsになります。
書き換え忘れるとビルドは通りますが、アプリは起動しないので注意しましょう。
private void Button_Tap(object sender, Microsoft.Phone.Controls.GestureEventArgs e)
{
    text.Text="Tapしました";
}

private void Button_DoubleTap(object sender, Microsoft.Phone.Controls.GestureEventArgs e)
{
    text.Text="Double Tapしました";
}

private void Button_Hold(object sender, Microsoft.Phone.Controls.GestureEventArgs e)
{
    text.Text="Holdしました";
}

private void Button_Flick(object sender, Microsoft.Phone.Controls.GestureEventArgs e)
{
    text.Text="Flickしました";
}

private void Button_DragDelta(object sender, DragDeltaGestureEventArgs e)
{
    text.Text="Panしました";
}

private void Button_PinchStarted(object sender, PinchStartedGestureEventArgs e)
{
    text.Text="Pinchをはじめました";
}

private void Button_PinchDelta(object sender, PinchGestureEventArgs e)
{
    text.Text+="Pinchをしています。";
}
実行してみましょう。今回紹介した6種類のジェスチャが利用できると思います。
Surface SDKでマルチタッチをエミュレート
実機があれば、アプリをデプロイすれば実行できるでしょう。しかしエミュレータにはマルチタッチの挙動を試す方法がありません。ここではSurface SDKを使って、エミュレータでマルチタッチを試す方法をご紹介します。
まず、ダウンロードーページからSurfaceSDK.msiをダウンロードしインストールします。
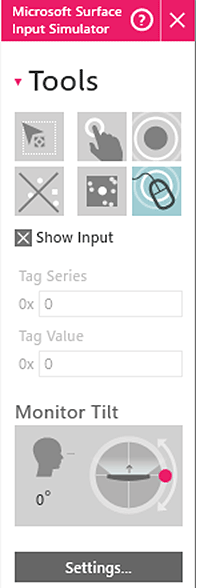
インストールできたら、[スタート]→[Microsoft Surface 2.0 SDK]→[Tools]→[Input Simulator]を起動します。すると、以下のウィンドウが起動します。
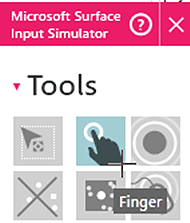
起動時はマウスモードになっているので、タッチモードに切り替えます。すると、クリックがタッチ扱いになります。
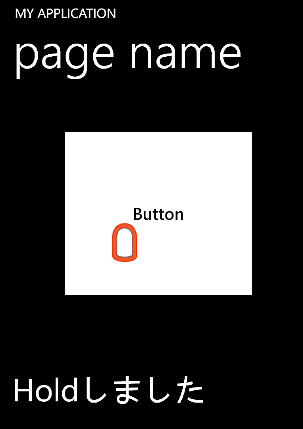
ではWindows Phoneでマルチタッチのデバッグを試してみましょう。1つ目のポイントで、左クリックしながら右クリックをします。すると、1つ目のポイントが固定されます。
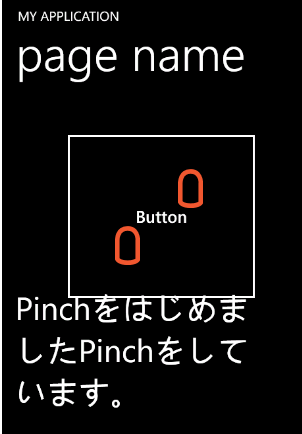
この状態で2つ目のポイントをドラッグしてみましょう。Pinchのジェスチャが実行されます。これで実機がなくても、エミュレータでマルチタッチが試せます。
固定した1つ目のポイントを解除するには、1つ目の近くで左クリック+右クリックをすれば解除されます。
次回は、Windows Phoneアプリのプロトタイピング
これまで、Windows Phoneの色使いやMetro UI、PanoramaやPivotなど、フロントエンドのWindows Phoneらしさを紹介してきました。
次回は、Windows Phoneのプロトタイピングについて紹介します。プロトタイピングにはSketchFlowを用います。
著者紹介
泉本優輝
UIデザインからプログラミング、表現までやりたい、自称クリエイティブデザイナ
“さわってみたい”を創ることが目標。フィジカルコンピューティングなどの試作を行う傍ら、コミュニティ活動ではExpression Blendを中心としたセッションを行っている
- Windows Phoneアプリの要「ビヘイビア」の基礎知識
- スマホに欠かせない位置情報/地図を使うアプリを作るには
- Windows PhoneをShake!加速度センサアプリを作るには
- Windows Phoneで動くカメラアプリ作成の基礎知識
- [応用編]RSSリーダーWindows Phoneアプリの作り方
- Windows Phoneアプリ開発情報“まとめ”とプロトタイピング
- Windows PhoneのMetro UIをタッチでジェスチャ操作
- PanoramaでWindows Phoneならではの横スクロール
- Windows Phoneの色使いとTileをアプリに生かせ!
- iOS/AndroidとWindows PhoneのUI、ここまで違う!
関連記事
- スマホ開発者が知るべきWindows Phone 7つの特徴
Windows Phone Developer Dayレポート - たった30分で完成。初めてのWP7アプリ開発
特集:Windows Phone “Mango”開発入門 - スタート・ダッシュで差をつけるWP7の基礎知識
特集:開発者のためのWindows Phone概説 - 「Windows Azure Toolkit for WP7」を試してみた
.NET開発者中心 厳選ブログ記事 - Windowsでもスマートにできるマルチタッチの基礎知識
Windowsタブレット向けマルチタッチアプリ開発(1)
Copyright © ITmedia, Inc. All Rights Reserved.

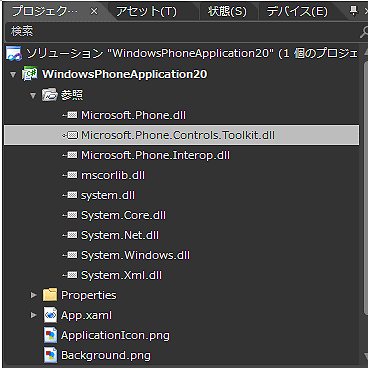 WPToolkitを参照に追加
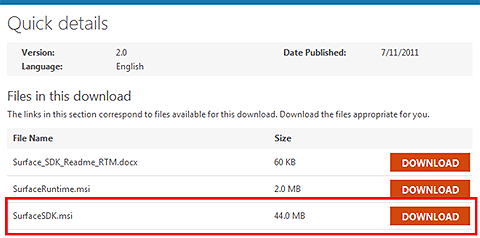
 Input Simulator
 固定された1つ目のポイント
 エミュレータ上でのマルチタッチ