[解決!Python]Requestsモジュールを使って、Webページやデータを取得するには:解決!Python
Pythonの外部ライブラリであるRequestsモジュールを使うと、人の目にも分かりやすい形式でWebページやWeb APIにアクセスし、その結果を取得できる。
この記事は会員限定です。会員登録(無料)すると全てご覧いただけます。
* 本稿は2022年9月27日に公開された記事をPython 3.12.5で動作確認したものです(確認日:2024年8月10日)。
import requests # 「pip install requests」などが必要
# GETメソッドによるWebページの取得
url = 'https://atmarkit.itmedia.co.jp/ait/articles/2209/20/news032.html'
res = requests.get(url)
# Webページの内容
print(res.text) # 出力結果は省略
# ステータスコード
print(res.status_code) # 200
# エンコーディング
print(res.encoding) # ISO-8859-1
print(res.apparent_encoding) # SHIFT_JIS
# レスポンスヘッダー
print(res.headers)
# 出力結果:
#{'Date': 'Thu, 22 Sep 2022 01:23:30 GMT', 'Content-Type': 'text/html',
# 'Transfer-Encoding': 'chunked', 'Connection': 'keep-alive',
# 'Server': 'nginx', 'Vary': 'Accept-Encoding',
# 'X-Frame-Options': 'SAMEORIGIN',
# 'Strict-Transport-Security': 'max-age=31536000', 'Content-Encoding': 'gzip'}
# レスポンスヘッダーの値は大文字小文字を区別しない辞書形式
print(res.headers['Content-Type']) # text/html
print(res.headers['content-type']) # text/html
# URLパラメーター
url = 'https://httpbin.org/get'
payload = {'key1': 10, 'key2': 'string'}
res = requests.get(url, params=payload)
print(res.url) # https://httpbin.org/get?key1=10&key2=string
# カスタムヘッダー
headers = {'user-agent': 'Mozilla/5.0'}
res = requests.get(url, headers=headers)
print(res.text)
# 出力結果:
#{
# "args": {},
# "headers": {
# "Accept": "*/*",
# "Accept-Encoding": "gzip, deflate",
# "Host": "httpbin.org",
# "User-Agent": "Mozilla/5.0",
# "X-Amzn-Trace-Id": "Root=1-632cee08-20fc52704bd03e22193dd675"
# },
# "origin": "YYY.YYY.YYY.YYY",
# "url": "https://httpbin.org/get"
#}
# JSONデータ
url = 'https://httpbin.org/json'
res = requests.get(url)
print(res.text)
# 出力結果:
#{
# "slideshow": {
# "author": "Yours Truly",
# "date": "date of publication",
# "slides": [
# {
# "title": "Wake up to WonderWidgets!",
# "type": "all"
# },
# {
# "items": [
# "Why <em>WonderWidgets</em> are great",
# "Who <em>buys</em> WonderWidgets"
# ],
# "title": "Overview",
# "type": "all"
# }
# ],
# "title": "Sample Slide Show"
# }
#}
jsondata = res.json()
print(jsondata['slideshow'])
# 出力結果:
#{'author': 'Yours Truly', 'date': 'date of publication',
# 'slides': [{'title': 'Wake up to WonderWidgets!', 'type': 'all'},
# {'items': ['Why <em>WonderWidgets</em> are great',
# 'Who <em>buys</em> WonderWidgets'], 'title': 'Overview', 'type': 'all'}],
# 'title': 'Sample Slide Show'}
# リダイレクト
url = 'https://www.atmarkit.co.jp/ait/articles/2008/21/news017.html'
res = requests.get(url)
print(res.url) # https://atmarkit.itmedia.co.jp/ait/articles/2008/21/news017.html
print(res.history) # [<Response [301]>, <Response [301]>]
for hist in res.history:
print(hist.url)
print(hist.headers['location'])
# 出力結果:
#https://www.atmarkit.co.jp/ait/articles/2008/21/news017.html
#https://atmarkit.itmedia.co.jp/ait/articles/2008/21/news017.html
Requestsモジュール
Pythonには標準でURLを扱うためのurllibモジュールが付属している。だが、人にとってより自然な形でHTTPリクエストを実行可能なライブラリもある。それがRequestsモジュールだ。RequestsモジュールはPythonには標準で付属していないので、「pip install requests」コマンドなどを実行して別途インストールした上でインポートする必要がある。
RequestsモジュールはHTTPのGET/POSTなどのメソッドに対応した関数や、HTTPリクエスト/HTTPレスポンスを表すクラスなどを提供しており、これらを使うことで人が読みやすく、何を意図しているのかが分かりやすいコードの記述が可能になっている。
requests.get関数
RequestsモジュールにはHTTPメソッドに応じた次の関数がある。本稿ではrequests.get関数を主な例として、Requestsモジュールの基本的な使い方を紹介する。
- requests.get関数:GETメソッドに対応
- requests.post関数:POSTメソッドに対応
- requests.put関数:PUTメソッドに対応
- requests.delete関数:DELETEメソッドに対応
- requests.head関数:HEADメソッドに対応
- requests.patch関数:PATCHメソッドに対応
これらの関数にURLやリクエストに必要なパラメーターを渡して呼び出すと、リクエストがそのURLに送信され、呼び出し先が返したレスポンスがrequests.Responseクラスのインスタンスとして返される。
requests.get関数の構文を以下に示す。
requests.get(url, params=None, **kwargs)
urlパラメーターにはリクエストを送信するURLを指定する。paramsパラメーターにはURLに「?key=value」形式で付加するパラメーターを指定する(省略可能)。**kwargsパラメーターに指定できるキーワード引数としてはカスタムヘッダーを指定するheadersキーワード引数、クッキーを指定するcookiesキーワード引数、タイムアウトを指定するtimeoutキーワード引数などがある。これらについてはRequestsモジュールのドキュメントなどを参照されたい。
requests.get関数の呼び出し例を以下に示す。
import requests # 「pip install requests」などが必要
# GETメソッドによるWebページの取得
url = 'https://atmarkit.itmedia.co.jp/ait/articles/2209/20/news032.html'
res = requests.get(url)
# Webページの内容
print(res.text) # 出力結果は省略
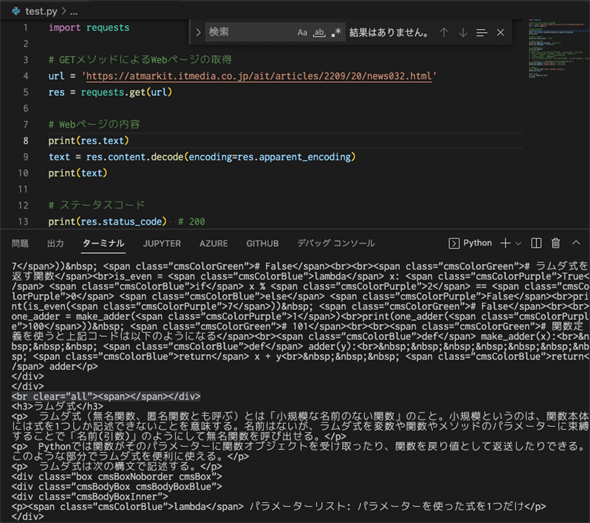
ここでは本連載の「ラムダ式(lambda)を記述して使うには」のURLを指定して、Webページの内容を取得し、そのテキスト(HTML)を表示している。
上のコードに示すようにrequests.get関数の使い方はとても簡単で、基本的にはURLを指定するだけだ。また、関数の戻り値(上述のrequests.Responseクラスのインスタンス)はtext属性を持っていて、これを読み込むことでWebページの内容が表示できる。
text属性以外にもrequests.Responseクラスには以下のような属性がある(一部)。
| 属性 | 説明 |
|---|---|
| text | レスポンスの内容(content属性)を文字列にデコードしたもの |
| content | レスポントの内容(バイト列)。テキスト表現ではなくバイナリデータを扱うときにはこちらを使用する |
| encoding | content属性をtext属性にデコードする際に使用したエンコーディング |
| apparent_encoding | charset_normalizerもしくはchardetによって推測されたエンコーディング。encoding属性の値とapparent_encoding属性の値が異なることもある |
| headers | レスポンスヘッダーを大文字小文字の区別をしない辞書の形式で格納したもの |
| url | リクエストしたURL。リダイレクトが発生した場合には、リダイレクト先のURL |
| history | get関数でリクエストしたURLがリダイレクトされた場合に、リダイレクトされた結果を示すrequests.Responseクラスのインスタンスを古いものから順に並べたリスト |
| requests.Responseクラスのインスタンスが持つ属性(一部) | |
ステータスコードの取得
例えば、ステータスコードを調べるにはrequests.Responseオブジェクトのstatus_code属性を参照すればよい。
print(res.status_code) # 200
エンコーディングの取得
また、エンコーディングを調べるにはencoding属性かapparent_encoding属性を参照する。
print(res.encoding) # ISO-8859-1
print(res.apparent_encoding) # SHIFT_JIS
これら2つの属性の値は異なることもある。encoding属性はcontent属性の内容をデコードしてtext属性にする際に使用される。これに対して、apparent_encoding属性はcharset_normalizerもしくはchardetにより推測されたエンコーディングを示すものだ。
例えば、この例で取得したコンテンツのURLは「https://atmarkit.itmedia.co.jp/ait/articles/2209/20/news032.html」だった。これは@ITの連載記事のURLだ。そして、res.encoding属性の値は「ISO-8859-1」となっている。これはアルファベットや西欧諸国で使われる文字を集めたものなので、res.text属性に格納されているテキストでは日本語をうまくデコードできていない。
こうしたときには、以下のようにapparent_encoding属性を使ってデコードできる。
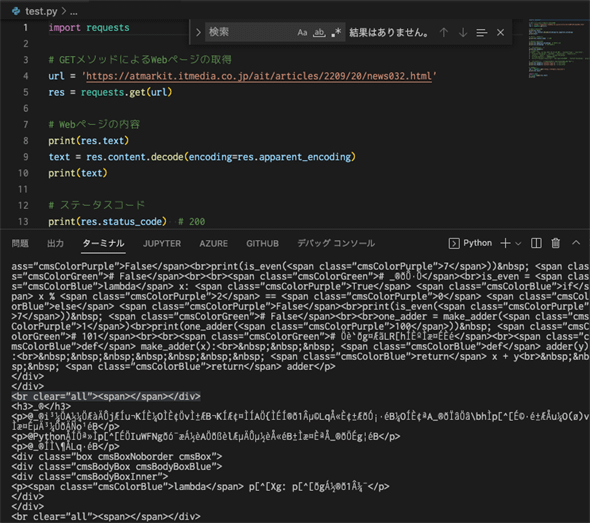
text = res.conent.decode(encoding=res.apparent_encoding)
res.apparent_encoding属性の値である「SHIFT-JIS」を指定してデコードした結果を以下に示す。
レスポンスヘッダーの取得
レスポンスヘッダーの内容はheaders属性にまとめられている。これは大文字小文字を区別しない辞書になっている。上の例でレスポンスヘッダーの内容がどうなっているかを以下に示す。
print(res.headers)
# 出力結果:
#{'Date': 'Thu, 22 Sep 2022 01:23:30 GMT', 'Content-Type': 'text/html',
# 'Transfer-Encoding': 'chunked', 'Connection': 'keep-alive',
# 'Server': 'nginx', 'Vary': 'Accept-Encoding',
# 'X-Frame-Options': 'SAMEORIGIN',
# 'Strict-Transport-Security': 'max-age=31536000', 'Content-Encoding': 'gzip'}
レスポンスヘッダーの値は大文字小文字の区別をしない辞書(requests.structures.CaseInsensitiveDict型のオブジェクト)なので、以下のように辞書のキーとして「Content-Type」を指定しても、「content-type」を指定しても同じ値が返される。
print(res.headers['Content-Type']) # text/html
print(res.headers['content-type']) # text/html
URLパラメーターとカスタムヘッダー
URLの末尾に「?key=value」形式でパラメーターを付加する場合には、{'key0': 'value0', 'key1': 'value1', ……}という形で付加したいパラメーターを辞書に格納し、それをrequests.get関数のparamsパラメーターに渡してやる。
以下に例を示す。ここではWeb APIのクライアントをテストするのに便利なhttps://httpbin.orgのget APIを使わせてもらおう。
url = 'https://httpbin.org/get'
payload = {'key1': 10, 'key2': 'string'}
res = requests.get(url, params=payload)
print(res.url) # https://httpbin.org/get?key1=10&key2=string
このコードでは、key1とその値である10、key2とその値である'string'を辞書に格納して、それをrequests.get関数のparamsパラメーターに渡している。requests.get関数の戻り値であるrequests.Responseクラスのインスタンスにはurl属性があるので、これを確認するとURLの末尾に「?key1=10&key2=string」とパラメーターが付加されたことが分かる。
独自のヘッダーを付加するのも同様な手順で行える。ただし、ヘッダーを付加する際にはrequests.get関数のheadersパラメーターを指定する。以下に例を示す。先ほどと同じくhttps://httpbin.org/getにリクエストを送信する例を以下に示す。
headers = {'user-agent': 'Mozilla/5.0'}
res = requests.get(url, headers=headers)
print(res.text)
# 出力結果:
#{
# "args": {},
# "headers": {
# "Accept": "*/*",
# "Accept-Encoding": "gzip, deflate",
# "Host": "httpbin.org",
# "User-Agent": "Mozilla/5.0",
# "X-Amzn-Trace-Id": "Root=1-632cee08-20fc52704bd03e22193dd675"
# },
# "origin": "YYY.YYY.YYY.YYY",
# "url": "https://httpbin.org/get"
#}
このコードではUser-Agentヘッダーの内容を独自に指定して、requests.get関数を呼び出している。上の出力結果を見れば分かる通り、https://httpbin.org/getからは受け取ったリクエストの内容を示すデータが返送される。headers属性を見ると、確かにUser-Agentヘッダーの内容が指定したものになっていることが分かる。
JSON形式のデータを受け取った場合
Web APIのようにJSON形式のデータが返されるときには、requests.Responseクラスのjsonインスタンスメソッドが使える。ここでは、先ほどと同じくhttps://httpbin.orgのJSON APIを使ってみよう。
url = 'https://httpbin.org/json'
res = requests.get(url)
print(res.text)
# 出力結果:
#{
# "slideshow": {
# "author": "Yours Truly",
# "date": "date of publication",
# "slides": [
# {
# "title": "Wake up to WonderWidgets!",
# "type": "all"
# },
# {
# "items": [
# "Why <em>WonderWidgets</em> are great",
# "Who <em>buys</em> WonderWidgets"
# ],
# "title": "Overview",
# "type": "all"
# }
# ],
# "title": "Sample Slide Show"
# }
#}
この出力は受け取ったデータを文字列化したものだ。これはjsonモジュールのloads関数を使えば、辞書に変換できる。が、上で紹介したjsonインスタンスメソッドを使えば同じことができる(出力結果は筆者が適宜改行を含めている)。
jsondata = res.json()
print(jsondata['slideshow'])
# 出力結果:
#{'author': 'Yours Truly', 'date': 'date of publication',
# 'slides': [{'title': 'Wake up to WonderWidgets!', 'type': 'all'},
# {'items': ['Why <em>WonderWidgets</em> are great',
# 'Who <em>buys</em> WonderWidgets'], 'title': 'Overview', 'type': 'all'}],
# 'title': 'Sample Slide Show'}
リダイレクト
requests.get関数はデフォルトでリダイレクトを許可している(禁止する場合には、allow_redirectsパラメーターにFalseを指定する)。リダイレクトが発生した場合、最終的なリダイレクト先がrequests.Responseオブジェクトのurl属性にセットされる。
@ITではCMSの刷新やHTTPS化、ドメイン変更などによって、各記事のURLが何度か変更されている。例えば、本連載の第1回「数値を0埋めして文字列化するには」のURLはもともと「https://www.atmarkit.co.jp/ait/articles/2008/21/news017.html」だったが、@ITのドメインが変更になったため、このURLをリクエストするとリダイレクトが発生し、現在のURLである「https://atmarkit.itmedia.co.jp/ait/articles/2008/21/news017.html」から記事の内容が返送される。
これを確認してみよう。変数urlには古い「https://www.atmarkit.co.jp」から始まるURLを代入して、requests.get関数を呼び出す。そして、返されたrequests.Responseオブジェクトのurl属性を確認する。
url = 'https://www.atmarkit.co.jp/ait/articles/2008/21/news017.html'
res = requests.get(url)
print(res.url) # https://atmarkit.itmedia.co.jp/ait/articles/2008/21/news017.html
url属性の値が新しい「https://atmarkit.itmedia.co.jp」で始まるURLに変わっていることが分かる。
リダイレクトが何回行われ、どのように遷移しているかはrequests.Responseインスタンスのhistory属性で確認できる。
print(res.history) # [<Response [301]>]>]
この例ではhistory属性には要素が1つしかないので、リダイレクトが一度行われていることが分かる(リストの要素は古い順が先頭で、新しいものが最後になるように並べられる)。
history属性のリストの要素は上の例を見れば分かるが、requests.Responseクラスのインスタンスである。そのため、ここまでに見てきた各種の属性を持っている。そこで各要素のurl属性やheaders属性のLocationヘッダーの値を調べるといったことも可能だ。
for hist in res.history:
print(hist.url)
print(hist.headers['location'])
# 出力結果:
#https://www.atmarkit.co.jp/ait/articles/2008/21/news017.html
#https://atmarkit.itmedia.co.jp/ait/articles/2008/21/news017.html
このコード例からはリダイレクト前のURLが「https://www.atmarkit.co.jp/ait/articles/2008/21/news017.html」で、それが「https://atmarkit.itmedia.co.jp/ait/articles/2008/21/news017.html」にリダイレクトされたことが分かる。
Copyright© Digital Advantage Corp. All Rights Reserved.


